DIY Autumn Leaf Lights

This summer has been a whirlwind of light and color. It never fails, summertime always brings beauty with so much wonderful daylight. I can honestly say that summer could be my favorite season… but then comes fall, and I’m reminded that autumn is the season of color. And in my book, nothing beats color.
When I say “autumn”, what do you think of? I always think of leaves. Fall leaves are possibly the most gorgeous of nature’s decorations. September turns the trees into mosaics, full of reds, purples, yellows, and oranges. And not just any red. I’m talking scarlet. Rust. Gold. Burgundy. Complete, utter brilliance.
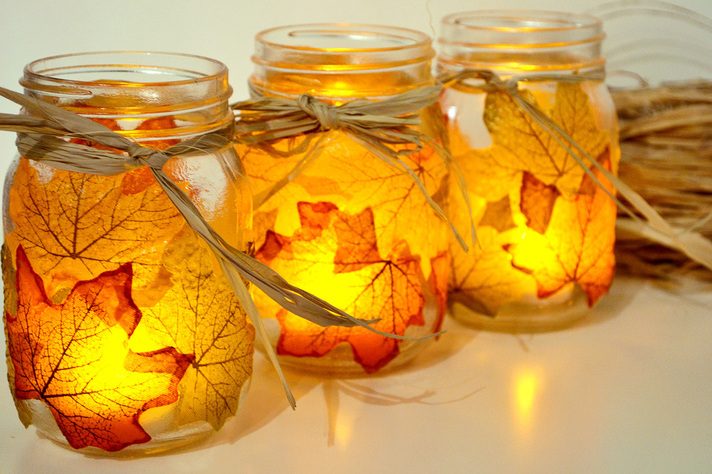
Capturing the essence of fall can be difficult, but I came across a light project recently that does such a great job of it, I had to share. I love DIY projects! This one is especially fun and is a good fit for the whole family.
First, head outside. Get up-close and personal with the leaves that have fallen on the ground and collect a nice little bundle of the most perfect leaves you can find. Head back inside and get started making your Autumn Leaf Light.

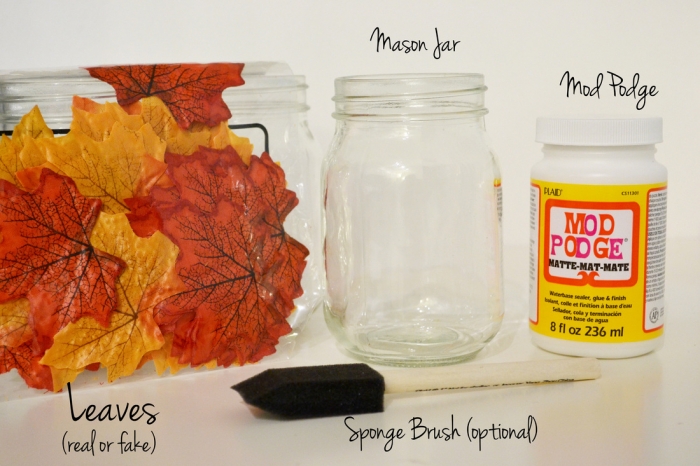
You’ll need the leaves you just collected, some Mod Podge (get at any crafts store), one clean mason jar (or more), a sponge brush, a few tea lights, and some time. Lay down newspaper if you’re worried about making a mess.
Make sure your leaves are malleable and won’t tear or crumble if you bend them around the jar. If you have to, take a towel and gently dampen the leaves so they’re more “bendy”.
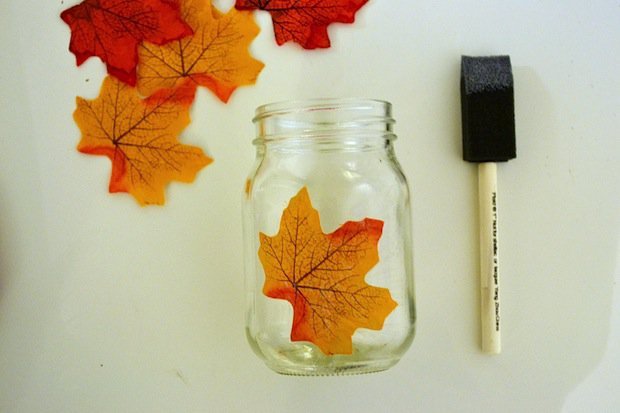
Dip your sponge brush into the Mod Podge and apply a light layer to one spot on the mason jar. Wait just a few seconds until the liquid becomes sticky, and then press your leaf onto the jar. Paint some more Mod Podge over the leaf, using the sponge brush to softly smooth out the edges.

You may need to press the corners of the leaf down as it dries onto the mason jar. Feel free to use a few extra layers of Mod Podge to get the leaf to stick. As the Mod Podge dries, you’ll see that the leaf is “glued” to the mason jar.
Repeat steps 2, 3, and 4 until your jar is covered in leafs to your liking. Set your jar aside and allow it to dry.

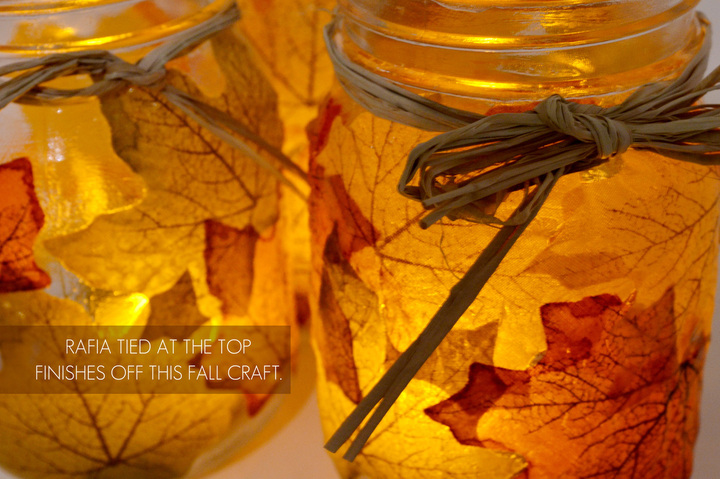
(Optional) Take some twine or rafia and tie it around the top of the mason jar to give the project the finishing touch. Place your tea light inside the jar and watch the colors of your leaves really come to life!
Try this project at home and let me know how it goes! For more DIY lighting ideas, check out my Pinterest!
Photos courtesy Spark & Chemistry blog
